linux下搭建maven私服(nexus)
创始人
2024-06-02 20:45:21
目录
- 1. 准备环境
- 2. 安装nexus
- 3. 配置nexus
- 4. 使用nexus
- 5. 手动上传jar包到私服仓库
1. 准备环境
搭建系统环境:Red Hat Enterprise Linux release 8.7
先将需要用到的压缩包(jdk-8u251-linux-x64.tar.gz、apache-maven-3.6.2-bin.tar.gz、nexus-3.31.1-01-unix.tar.gz)一并上传至/usr/local/src文件夹下,再执行初始化脚本: source init.sh 8.7,脚本内容如下:
#!/bin/bash#!/bin/bash
if [ -z $1 ]then echo '$1 is not exists or is empty'exit
fiecho "[BaseOS]
name=BaseOS
baseurl=https://mirrors.aliyun.com/rockylinux/8/BaseOS/\$basearch/os/
gpgcheck=0
enabled=1
gpgkey=https://mirrors.aliyun.com/rockylinux/RPM-GPG-KEY-ANOLIS[AppStream]
name=AppStream
baseurl=https://mirrors.aliyun.com/rockylinux/8/AppStream/\$basearch/os/
gpgcheck=0
enabled=1
gpgkey=https://mirrors.aliyun.com/rockylinux/RPM-GPG-KEY-ANOLIS[PowerTools]
name=PowerTools
baseurl=https://mirrors.aliyun.com/rockylinux/8/PowerTools/\$basearch/os/
gpgcheck=0
enabled=1
gpgkey=https://mirrors.aliyun.com/rockylinux/RPM-GPG-KEY-ANOLIS[Extras]
name=Extras
baseurl=https://mirrors.aliyun.com/rockylinux/8/extras/\$basearch/os/
gpgcheck=0
enabled=1
gpgkey=https://mirrors.aliyun.com/rockylinux/RPM-GPG-KEY-ANOLIS
" > /etc/yum.repos.d/online.repoecho vers:$1
sed -i "s/8/$1/g" /etc/yum.repos.d/online.repodnf install -y vimcd /usr/local/src/
tar -zxvf apache-maven-3.6.2-bin.tar.gz
tar -zxvf jdk-8u251-linux-x64.tar.gzecho "export MAVEN_HOME=/usr/local/src/apache-maven-3.6.2" >> /etc/profile
echo "export JAVA_HOME=/usr/local/src/jdk1.8.0_251" >> /etc/profile
echo "export PATH=\$PATH:\$MAVEN_HOME/bin:\$JAVA_HOME/bin" >> /etc/profile
source /etc/profilesystemctl stop firewalld && systemctl disable firewalld
执行完init.sh后,编辑maven的配置文件settings.xml, 在标签里面天下如下内容:
vim /usr/local/src/apache-maven-3.6.2/conf/settings.xml
aliyunmaven * aliyun https://maven.aliyun.com/repository/public
nexus-163 * Nexus 163 http://mirrors.163.com/maven/repository/maven-public/
检测下环境是否初始化成功,如下图所示表示环境准备完毕
mvn -v

2. 安装nexus
创建用户
useradd nexus
echo 'nexus'|passwd --stdin nexus

解压nexus的压缩包
tar -zxvf nexus-3.31.1-01-unix.tar.gz

将nexus解压后的两个目录以及目录下的子目录和文件的属主属组改成nexus
chown -R nexus:nexus nexus-3.31.1-01
chown -R nexus:nexus sonatype-work

修改/etc/security/limits.conf,
vim /etc/security/limits.conf
添加如下内容
nexus - nofile 65536

编辑/usr/local/src/nexus-3.31.1-01/bin/nexus.rc文件
vim /usr/local/src/nexus-3.31.1-01/bin/nexus.rc

编辑/usr/local/src/nexus-3.31.1-01/bin/nexus
vim /usr/local/src/nexus-3.31.1-01/bin/nexus
将INSTALL4J_JAVA_HOME_OVERRIDE前面的#去掉,并且赋值jdk的路径
INSTALL4J_JAVA_HOME_OVERRIDE=/usr/local/src/jdk1.8.0_251

编辑/etc/systemd/system/nexus.service
vim /etc/systemd/system/nexus.service
[Unit]
Description=nexus service
After=network.target[Service]
Type=forking
LimitNOFILE=65535
ExecStart=/usr/local/src/nexus-3.31.1-01/bin/nexus start
ExecStop=/usr/local/src/nexus-3.31.1-01/bin/nexus stop
User=nexus
Restart=on-abort
TimeoutSec=600[Install]
WantedBy=multi-user.target
启动nexus
systemctl daemon-reload
systemctl start nexus
查看nexus状态
systemctl status nexus

3. 配置nexus
接下来就来开始访问nexus
访问地址:192.168.225.25:8081

登录下

登录以后需要初始设置一下以及修改登陆密码


4. 使用nexus
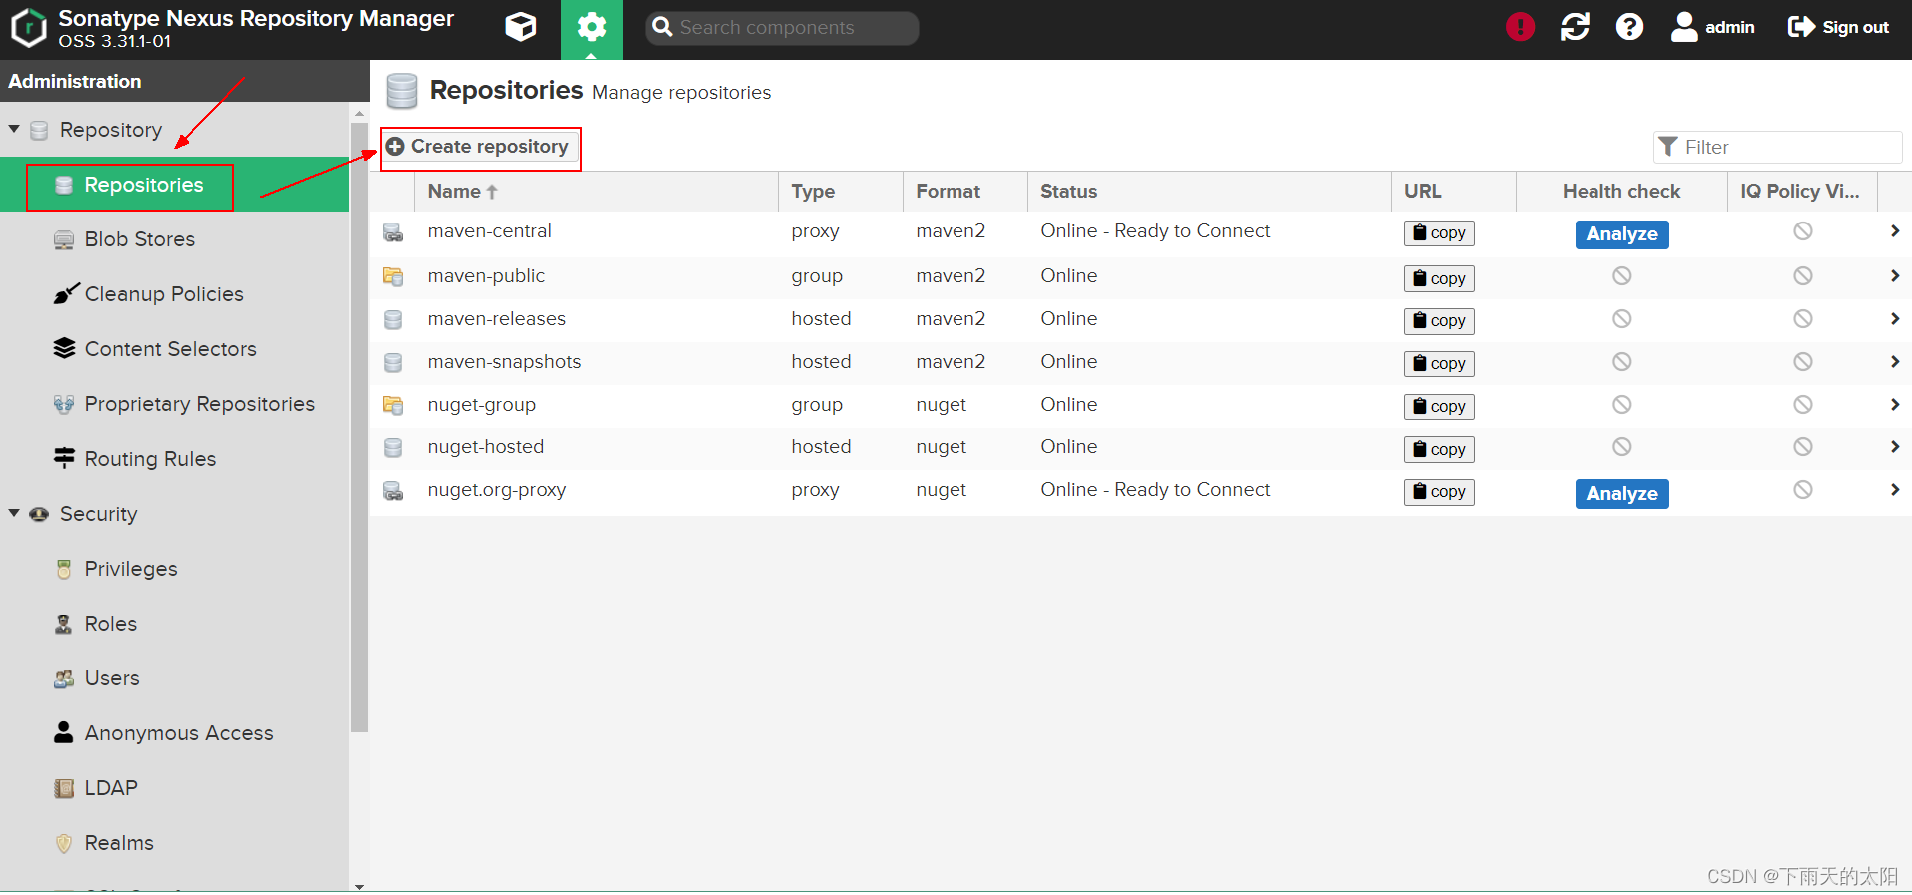
创建私服代理仓库


这里填写阿里云仓库地址


在maven的settings.xml里面添加私服仓库地址,把下面这个添加在标签里面即可
maven-public * maven-public http://192.168.225.25:8081/repository/maven-public/
5. 手动上传jar包到私服仓库
待更新
相关内容
热门资讯
德尔股份跌2.00%,成交额7...
1月28日,德尔股份盘中下跌2.00%,截至10:13,报34.29元/股,成交7676.55万元,...
黑猫股份涨2.07%,成交额5...
1月28日,黑猫股份盘中上涨2.07%,截至10:14,报9.39元/股,成交5847.32万元,换...
云铝股份股价涨5.75%,中邮...
1月28日,云铝股份涨5.75%,截至发稿,报34.93元/股,成交13.69亿元,换手率1.17%...
拱东医疗跌2.05%,成交额1...
1月28日,拱东医疗盘中下跌2.05%,截至10:14,报19.14元/股,成交1117.46万元,...
云铝股份股价涨5.75%,民生...
1月28日,云铝股份涨5.75%,截至发稿,报34.93元/股,成交13.75亿元,换手率1.17%...
